
City account settings
Keep your city's details up to date and manage topics, alerts, residents and social sharing.
Open your settings
- Click your name at the bottom of the left sidebar.
- Click Settings.
The Account Settings page opens with these tabs:
| Tab | What's there |
|---|---|
| Accounts | App image, city message, contact details, address and departments |
| Admin Users | Your staff team. See Manage your team and permissions. |
| Topics | The topics residents follow for notifications |
| Alerts | Which official alerts your city receives |
| Residents | Your list of residents and newsletter subscribers |
| Social sharing | Sharing posts to your city's Facebook Page |
Some tabs only appear when the feature is turned on for your city.
Who can change settings
- Any staff member can open Settings and look around.
- Everyone except Standard Admin (View Only) can edit the city's details, alert preferences and social sharing.
- Admins and Super Admins manage the team, topics and residents.
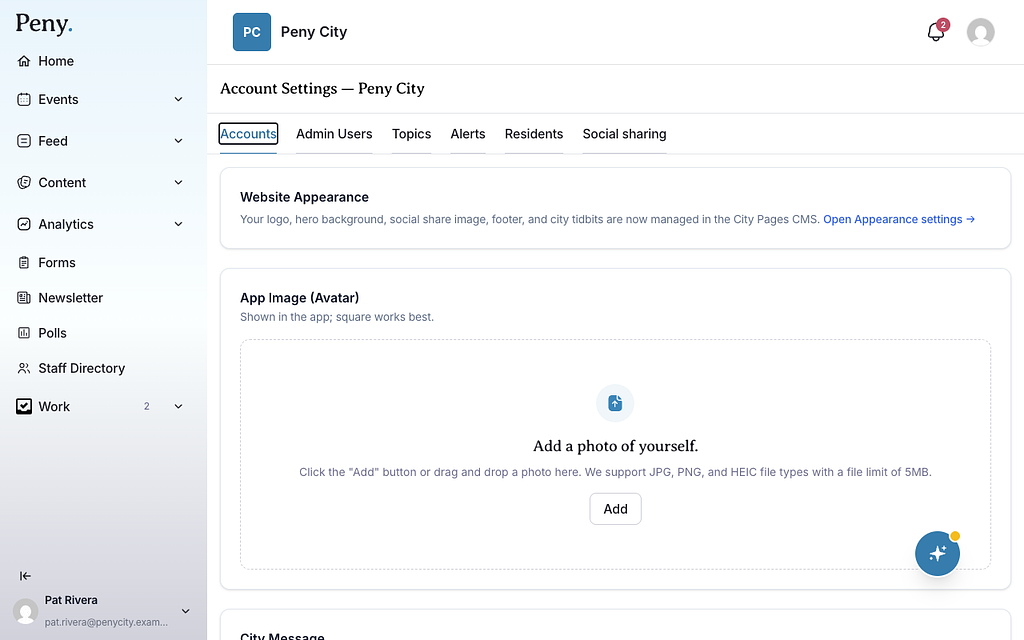
Accounts tab
Website appearance
Your website's logo, hero background, social share image, footer and city tidbits are managed in the website builder, not here. Admins can click Open Appearance settings to go there. See Change your site's appearance.
App Image (Avatar)
This is your city's picture in the Peny app. A square image works best. Click Add, or drag a photo onto the box. Use a JPG, PNG or HEIC file up to 5 MB.
City Message
The short line shown under your city's name on your landing page. Edit it in the General card.
Update your contact details
- In the General card, click the pencil icon (Edit General).
- In the Edit Info window, update any of these:
- Homepage: a link to your official city website.
- City Message: the subtitle on your landing page.
- Office Email: an optional public contact email, shown in your website footer and in the AI disclaimer under your website's search (unless you've set an AI disclaimer link in your site's appearance settings).
- Office Phone: a general public phone number for the city or city hall.
- Click Save.
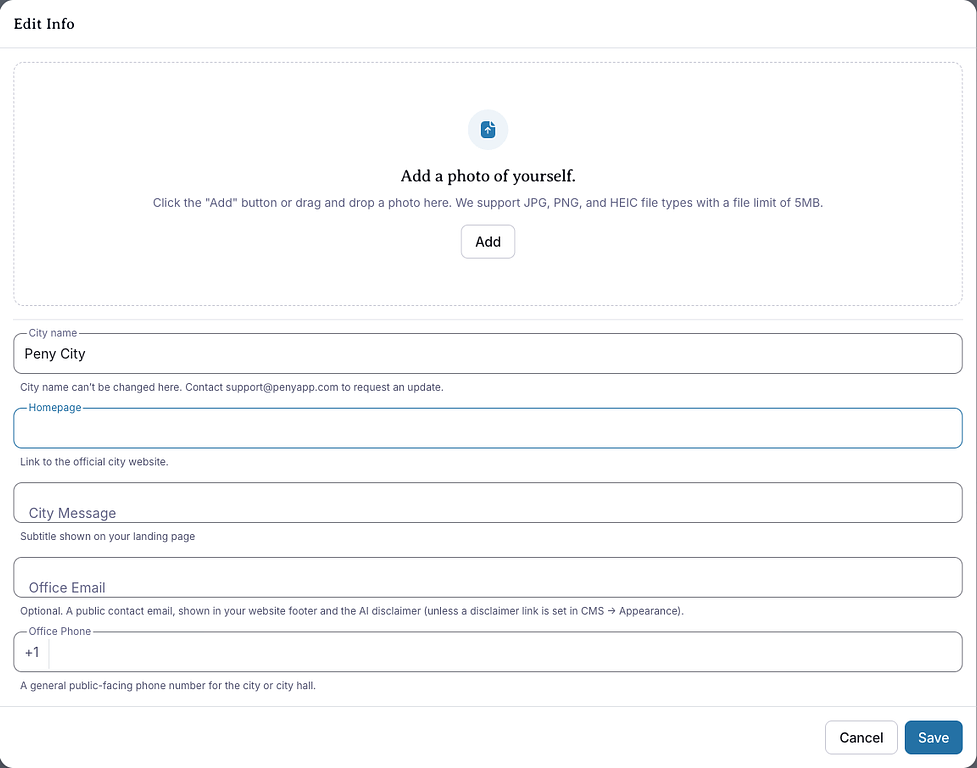
The city name can't be changed here. Email support@penyapp.com to request an update.
Update your address
- In the Primary Address card, click the pencil icon.
- In the Edit Address window, search for the address of city hall or your main offices.
- Click Save.
This address is used for "Visit Us" and contact details.
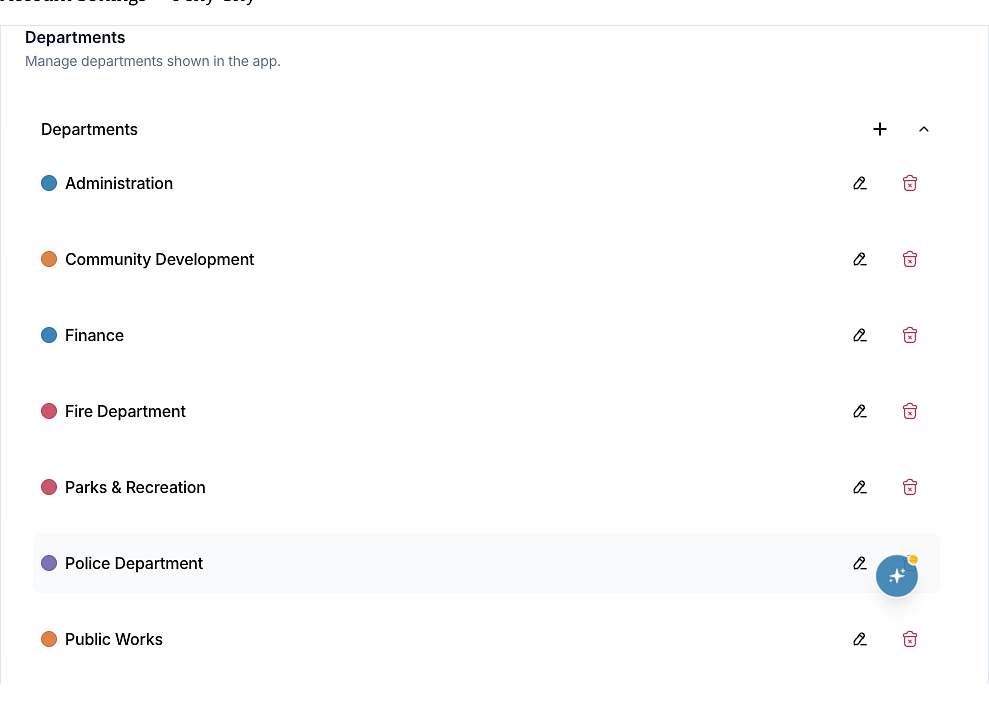
Departments
The Departments card lists your city's departments in alphabetical order.
- Add: Click +, type the Department name, and click Save.
- Rename: Click the pencil icon, change the name, and click Save.
- Delete: Click the trash icon, then Delete. This can't be undone.
If your city uses the staff directory, you can also choose each department's Directory color and Directory icon here. See Manage the staff directory.
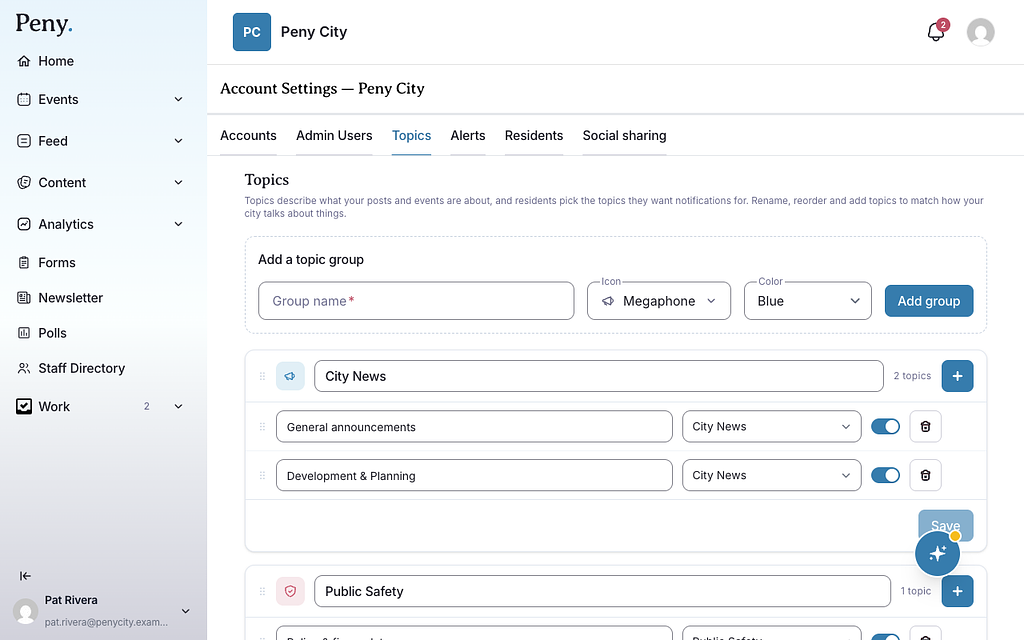
Topics tab
Topics describe what your posts and events are about, and residents pick the topics they want notifications for. You can rename, reorder and add topics to match how your city talks about things.
- Rename a topic or group by typing over its name, then click Save on that group.
- Reorder topics and groups by dragging them.
- Add a topic: click + on a group, type the Topic name, and click Add topic.
- Add a group: click Add a topic group, type a Group name, choose an Icon and Color, and click Add group.
- Move a topic to another group with its group dropdown.
- Turn a topic off with its switch. Turned-off topics show a Disabled badge.
- Delete a topic only if it isn't In use. A topic that's in use can be turned off but not deleted. Topic groups can't be deleted.
Admins and Super Admins can change topics. Other staff can view them.
Don't see this? It may not be turned on for your city yet — email support@penyapp.com.
Alerts tab
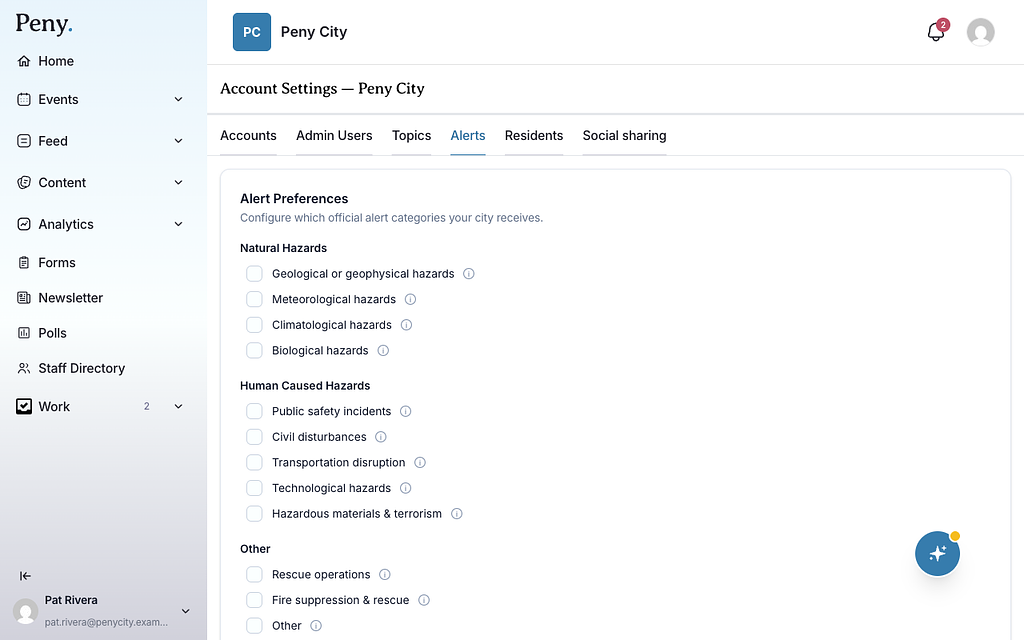
Peny can post official alerts, such as those from the National Weather Service, to your city's feed. Choose which kinds your city receives.
- Click the Alerts tab.
- In Alert Preferences, tick every category you want under Natural Hazards, Human Caused Hazards and Other. Use the info icon next to a category to see a description and examples.
- Click Save Preferences.
When you save, every unticked category is turned off, and new alerts of that kind stop being posted. Before you save for the first time, check that each category you want is ticked. If your city also uses custom topics, the Topics tab has an Official alerts card where you choose which topic each kind of alert notifies residents under.
Don't see this? It may not be turned on for your city yet — email support@penyapp.com.
Residents tab
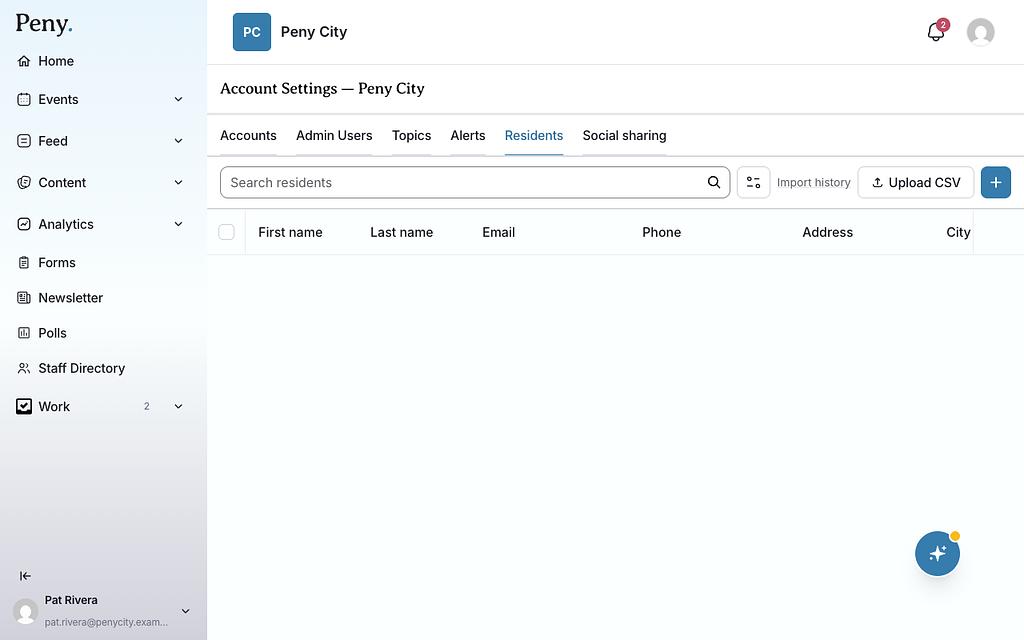
This is your list of residents, including newsletter subscribers. It shows each person's name, contact details, address, newsletter status, whether they've joined the app, and where they came from.
- Use the search box to find residents by name, email, phone or city.
- Click Filters to narrow by Newsletter status, Source, Joined the app or date added.
- Use a row's menu to Edit, Subscribe to newsletter, Unsubscribe from newsletter, Resend confirmation or Delete.
- Tick several rows to subscribe, unsubscribe or delete them at once.
Add residents
- One at a time: Click + (Add resident), fill in their name, email, phone and address, tick Subscribe this resident to the newsletter if they asked for it, and click Save.
-
From a spreadsheet:
- Click Upload CSV.
- Choose your CSV file, with one resident per row and column headers in the first row. Files can be up to 10 MB.
- Click Upload.
- Match your columns to resident fields: Email, First name, Last name, Phone, Address (line 1), City, State and ZIP. Email is required. Choose — Don't import — for columns you don't need.
- Click Import residents.
- Click Import history to see how many residents were created, updated, skipped or had errors.
Admins and Super Admins can add, edit, delete and import residents. Staff who can create content can change newsletter subscriptions.
Social sharing tab
Share your Peny posts to your city's Facebook Page automatically.
- Click the Social sharing tab.
- Click Connect a Facebook Page.
- Sign in to Facebook when asked.
- Under Choose the Page to manage with Peny, pick your city's Page. Only Pages you're an admin of on Facebook appear here.
- Click Manage with Peny.
To change how sharing works, click Manage on the connection, then Edit settings. You can change the Post message template, choose Which post types to share, and turn Automatically share new posts on or off. Click Save settings.
On the connection page you can also Send test post, see your Shared posts, or Disconnect to stop sharing new posts. If a connection shows Needs reconnect, reconnect it to keep sharing.
Don't see this? It may not be turned on for your city yet — email support@penyapp.com.