
Target a zone and notify residents
Draw an area on a map so the residents who live there hear about your post.
How notifications reach residents
When you publish a post, Peny notifies residents in two ways:
- By topic. Residents who follow the post's topic are notified, wherever they live.
- By area. When you turn on Notify a Specific Area and draw an area, residents whose home address is inside it are notified too, even if they don't follow the post's topic.
Use an area for news that matters most to one part of town: road work, a water main repair, street sweeping or leaf pickup.
Residents are matched by the home address on their Peny profile. Residents who haven't added a home address can't be matched to an area.
Before you start
- You need a post that you can edit. See Create and publish a post.
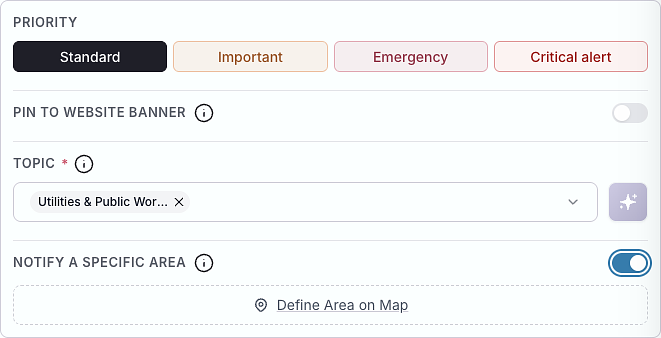
- Areas work with Standard, Important and Emergency posts. A Critical alert can't be limited to an area: "Critical alerts are sent to all residents regardless of area."
Draw the area
- In the composer, find Notify a Specific Area and turn the switch on.
- Click Define Area on Map. The Define Notification Area window opens.
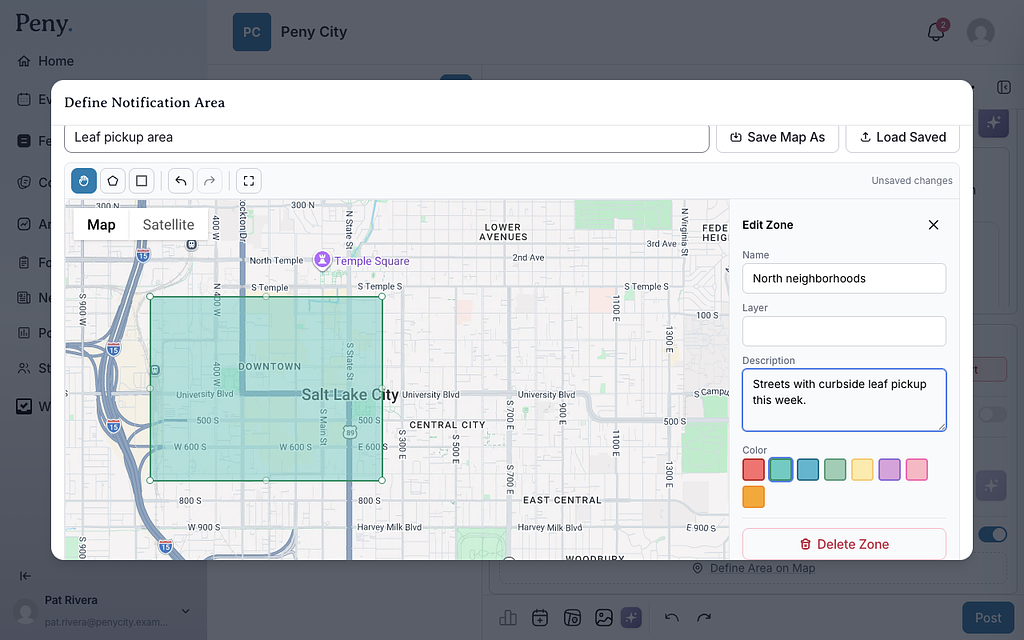
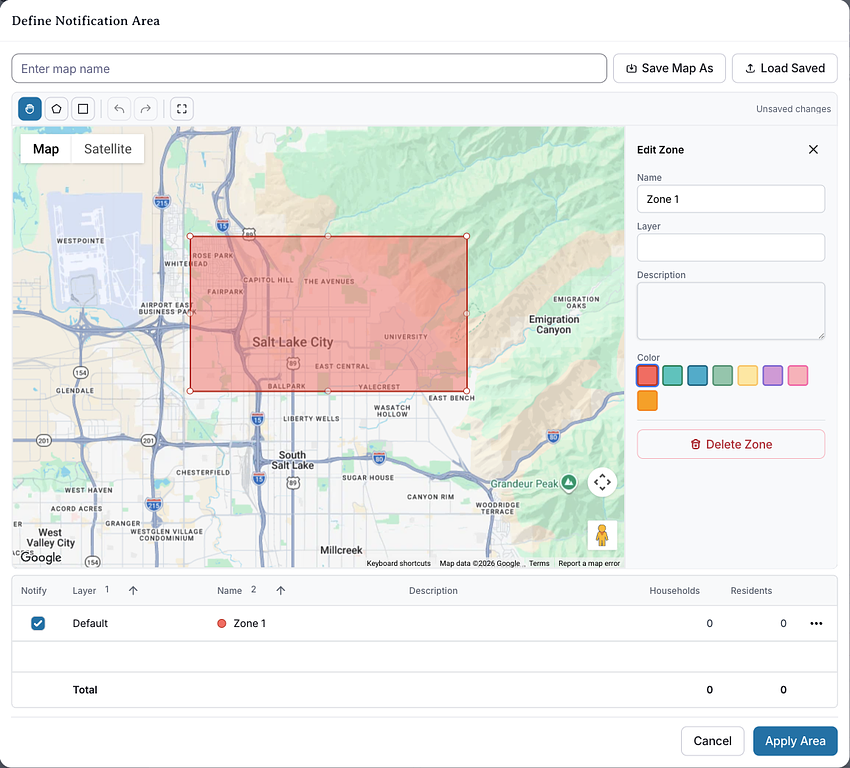
- In the toolbar above the map, click Draw Polygon to outline an area point by point, or Draw Rectangle to drag out a box.
- Draw the area on the map. You can draw more than one zone.
- Optional: click a zone to open Edit Zone. Give it a Name and Description, and pick a Color. Delete Zone removes it.
- Check the table under the map. It shows how many Households and Residents are in each zone. Untick Notify on any zone you want to leave out.
- Click Apply Area. It turns on once at least one zone is ticked. Back in the composer, the area shows as "1 zone selected" (or the number of zones you drew), with an Edit link to change it.
- Finish your post and click Post.
Map tools
- Pan Mode (Hand) — move the map without drawing.
- Draw Polygon and Draw Rectangle — draw a zone.
- Undo (Ctrl+Z) and Redo (Ctrl+Y) — step back or forward.
- Toggle Fullscreen — make the map fill the screen.
- Map and Satellite — switch the map style.
Save an area to use again
If you notify the same area often, save it as a map.
- Draw your zones.
- Type a name in the Enter map name box above the map.
- Click Save Map As and choose where to save it in your Content library.
Next time, click Load Saved in the Define Notification Area window and choose the map. Its zones are added to the map, ready to apply.
Frequently asked questions