
Contact Card block
Put one person's contact details on a page, straight from the staff directory.
What it's for
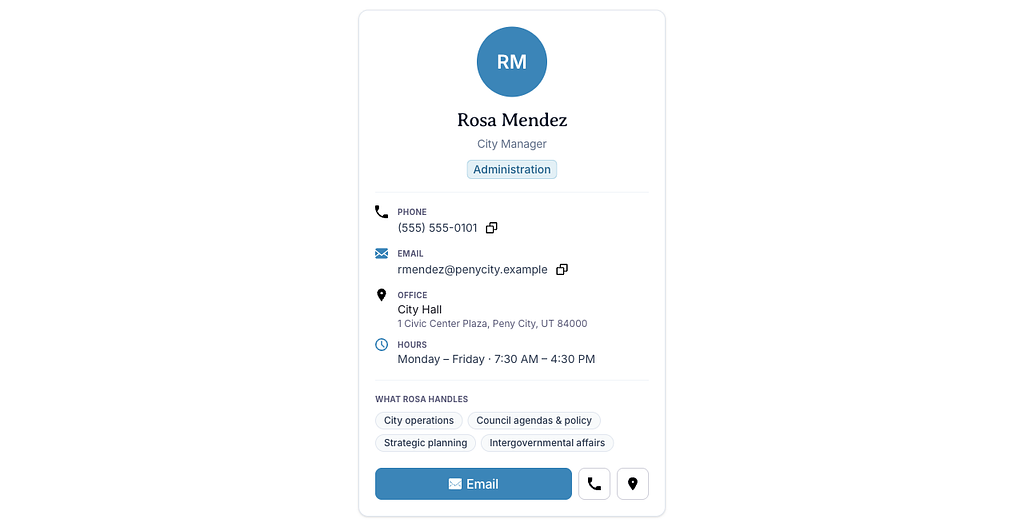
A Contact Card shows one person from your staff directory — photo, name, title, department, phone, email, office, hours and what they handle — with buttons residents can use to email or call them. Put it on the page for the service that person runs, like the parks manager on the Parks page.
Add it to a page
Who can do this: City admins, in the website builder.
You need the staff directory, with people in it. These blocks show what's in the directory, so update people there, not on the page.
Don't see this? It may not be turned on for your city yet — email support@penyapp.com.
- In the left sidebar, open Content › City Pages.
- Find the page and click Edit. The page opens in the builder.
- In the Add blocks panel on the left, find Contact Card under Dynamic. You can also type "Contact Card" in Search blocks.
- Drag Contact Card onto the page where you want it. Or select the block it should follow and click Contact Card to add it right below — with nothing selected, it goes at the end of the page.
- The new block is selected and its settings appear in the Settings panel on the right.
- Click Edit settings in the Settings panel (or double-click the block).
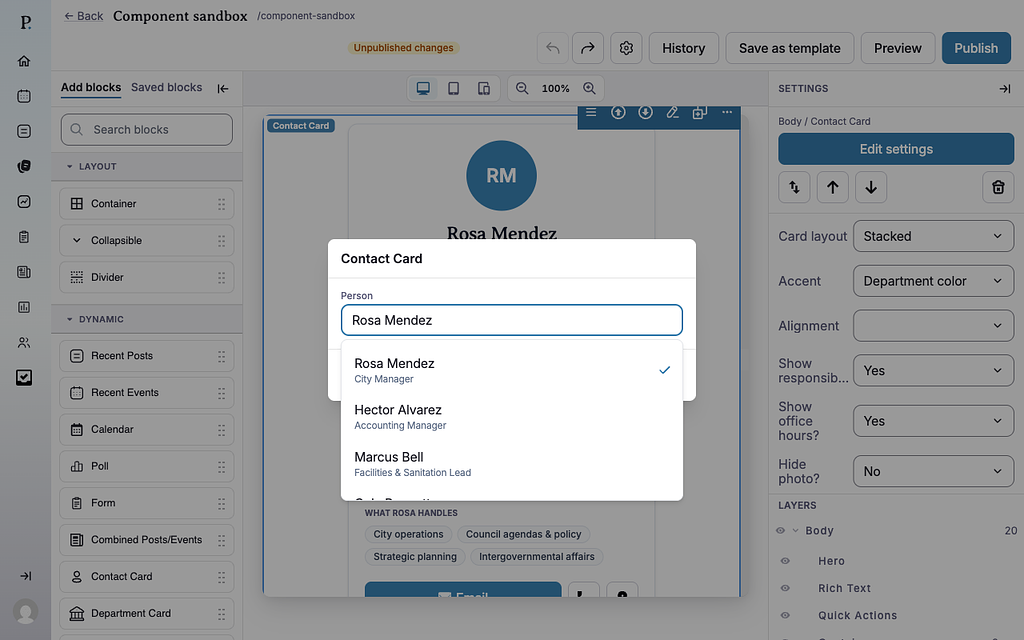
- Under Person, click Choose a person… and type a name or job title. Pick the person.
- Click Save.
- Pick the card's layout and options in the Settings panel.
- Your changes save as a draft as you go. Residents see them after you click Publish — or Ready for review, if your city reviews page changes.
Settings
In the side panel
- Card layout — Stacked (default): photo on top, centered. Row: a smaller photo beside the name. Banner: the photo and name on a colored header. Portrait: a large photo above the details.
- Accent — Department color (default) uses the color set for the department in the staff directory; City brand uses your city's brand color.
- Alignment — Left, Center (default) or Right. Places the card on the page when it isn't inside a Container column.
- Show responsibilities? — Yes (default) or No. Shows the "What [name] handles" list from the directory.
- Show office hours? — Yes (default) or No.
- Hide photo? — No (default) or Yes. When hidden, the card shows a colored line instead of a photo.
In the Edit popup
- Person — The staff member to show. Search by name or job title. Only active people in the directory are listed.
What residents see
A card with the person's photo (or their initials), name, title and department, then their phone, email, office and hours, and what they handle. Buttons let residents email, call, or get directions to the office, and small buttons copy the phone number or email address.
The card only shows the details the staff directory shows publicly. When someone updates the person in the directory, the card updates too. If the person is deactivated or removed from the directory, the card disappears from the page. Until you pick a person, the block shows nothing on the page.
Tips
- Put two or three cards side by side in a Container block's columns.
- Show a whole team with the Staff Section block instead of many Contact Cards.
- Keep the directory current — the card is only as accurate as the directory.
- Check phones: click the Mobile preview button above the canvas.