
Create a page
Start a new page, add blocks and set its name and address.
What it's for
Use a page for anything residents look up on your website: a department, a service, a park, meeting information. You build the page from blocks, and it stays hidden until you publish it.
Before you start
- City admins can create and edit pages.
- New pages start as a Draft. Residents can't open a draft page, even with a direct link.
- If your city has saved templates, you can start from one instead of a blank page. See Reuse work with templates and saved blocks.
Create the page
- In the left sidebar, open Content and click City Pages.
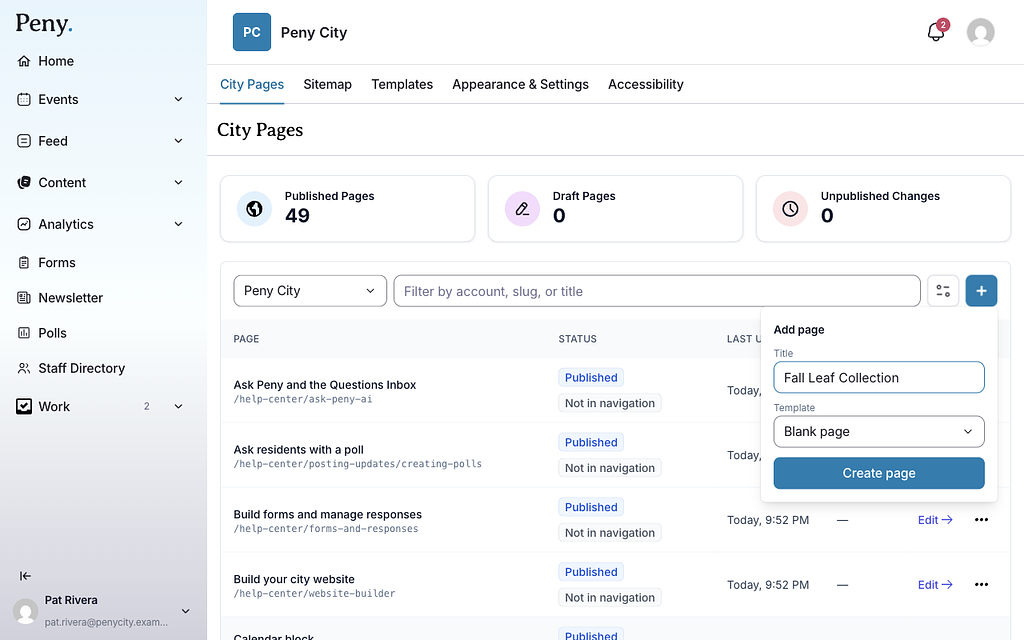
- Click the + button (Add page) to the right of the search box.
- In Title, type the page name, for example Parks & Recreation.
- If you see Template, leave Blank page selected or pick a template.
- Click Create page.
The builder opens with your new page and a Draft badge at the top. Peny makes the page's address from its title: Parks & Recreation becomes parks-recreation. If that address is already taken or reserved, Peny adds a number, such as parks-recreation-2.
You can also create a page from the Sitemap tab with + Page. See Organize your site menu.
Add blocks

- In the Add blocks panel on the left, find the block you want. Blocks are grouped as Layout, Content and Dynamic, or you can type in Search blocks.
- Drag the block onto the page where you want it.
You can also click a block to add it, or press Enter while it has keyboard focus. It goes right after the block you have selected, or at the bottom of the page when nothing is selected. The new block is selected so you can set it up right away.
To put blocks side by side, add a Container first and drag blocks into its columns. See Container block. To learn what each block does, see Website builder blocks.
Edit a block
- Click the block on the page to select it.
- Click the pencil (Edit) in the block's toolbar. You can also double-click the block, or click Edit settings in the Settings panel on the right.
- Make your changes in the window that opens.
- Click Save (in some blocks the button says Done).
Options that change how a block looks, such as alignment, style, spacing or how many items to show, are in the Settings panel on the right. They apply as soon as you pick them.
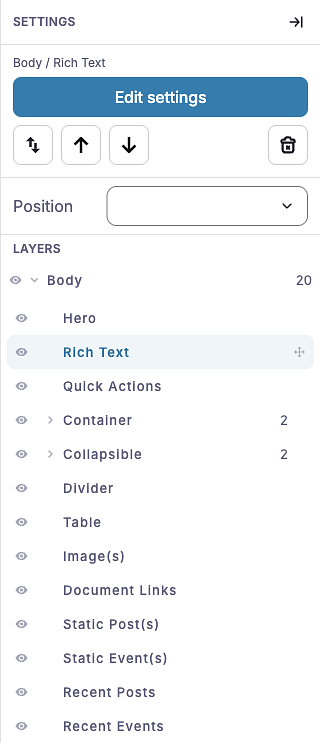
Container and Divider have no edit window. All of their options are in the Settings panel.
Move, copy and delete blocks
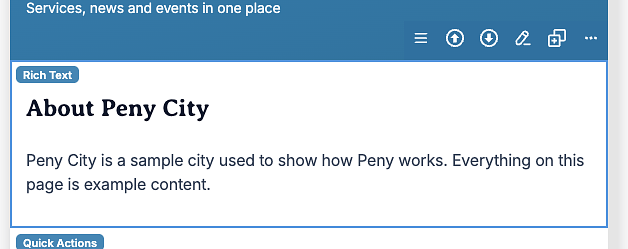
When you select a block, a toolbar appears on it:
- Move — drag this handle to move the block anywhere on the page, including into or out of a container.
- Move up and Move down — move the block one place.
- Move out of container — shows only for a block inside a container or collapsible. It moves the block out, right after its container.
- Edit — opens the block's editor.
- Duplicate — adds a copy right below the block.
- Delete — removes the block.
On blocks that hold their own content, such as Rich Text, Hero, Table or CTA Card, Delete is in the More (⋯) menu as Delete block, next to Save as block.
Using a keyboard? The Settings panel has the same actions as buttons: Move block, Move up, Move down and Delete block. After you press Move block, use the arrow keys to move the block, Enter to drop it and Escape to cancel. The Layers list under the settings shows every block on the page. Select a row to select that block.
Your work saves as you go
The builder saves your changes as a draft a moment after each edit. The status next to the toolbar buttons reads Draft saved with the time. Residents keep seeing the published page until you click Publish. See Publish, review and restore pages.
To see your draft the way residents will, click Preview. It opens in a new tab.
Change the page name, address or description
- In the builder, click the gear button (Page settings) in the toolbar.
- Change any of these fields:
- Page name — shown in the pages list, browser tabs and search results. The menu uses it too, unless the sitemap gives the link its own label.
- URL slug — the last part of the page's address. Use lowercase letters, numbers and dashes. The Public URL line under the field shows the full address.
- Search result description — the line shown under the page title in search results, about 160 characters. Leave it blank to use the page's first paragraph.
- Click Save settings.
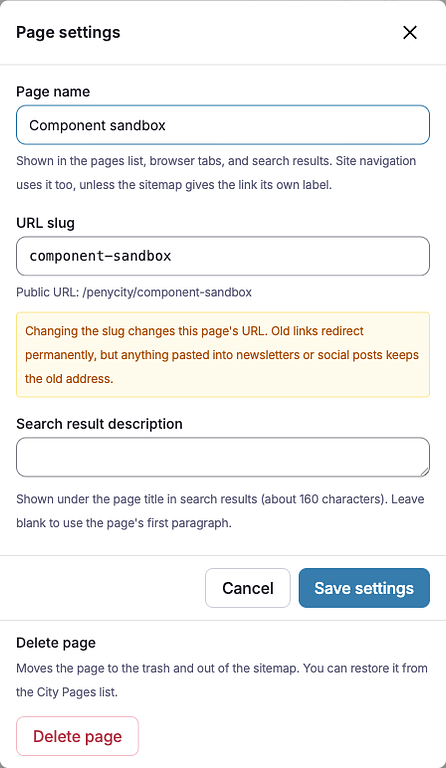
When you change the URL slug, old links redirect to the new address automatically. Links already pasted into newsletters, social posts or printed material still show the old address, so change slugs sparingly.
You can also open Page settings from the City Pages list: click ⋯ (More actions) on the page's row. Rename in the same menu changes only the page name.
Address rules
- Some words are reserved for Peny's own pages and can't be used as an address, such as
events,posts,forms,maps,help,supportandsettings. - Two pages in your city can't share an address.
- Pages can be nested at most 4 levels deep, for example
/departments/public-works/streets/snow-removal. Nesting comes from where you place the page in the menu. See Organize your site menu. - The home page has no page settings. Its name and address can't be changed, and it can't be deleted or unpublished.