
Manage the staff directory
Keep a public list of city staff, departments and services so residents know who to contact.
What the staff directory is for
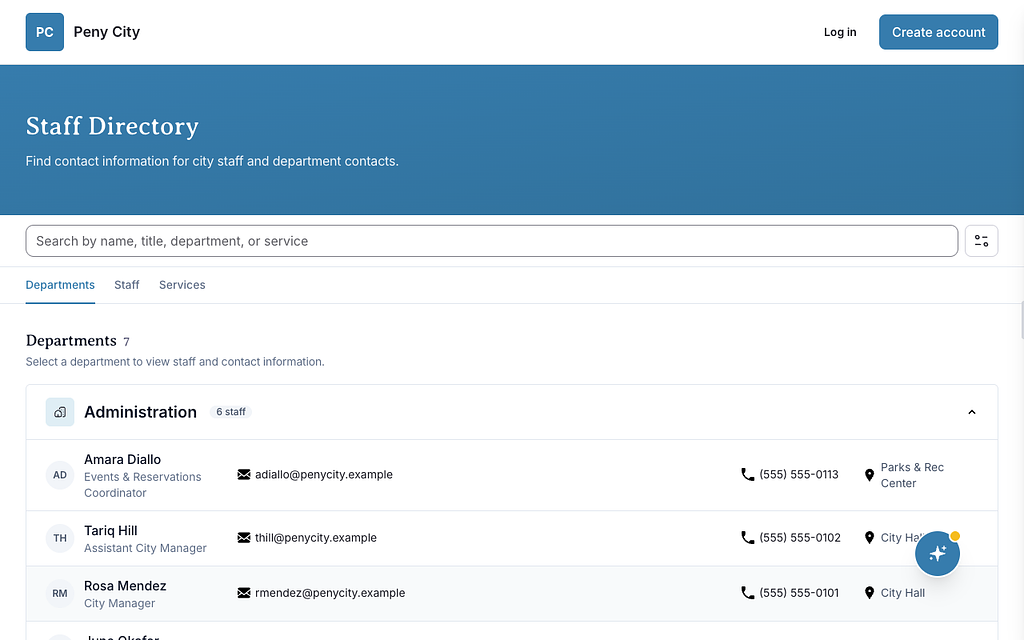
The staff directory is a public page on your city's site where residents can look up staff, departments and the services each one handles. Residents don't need to sign in to use it.
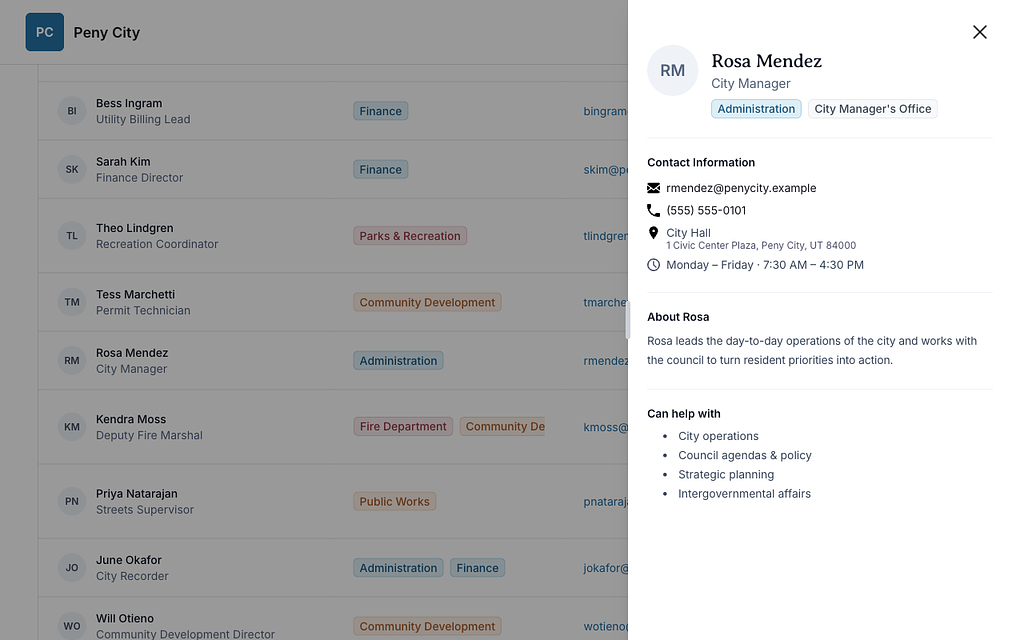
Residents can browse by Departments, Staff or Services, search "by name, title, department, or service", and narrow the list with Filters. Clicking a person shows their contact information, a short bio and what they can help with.
Before you start
- Who can do this: Any city staff member can add, edit and remove directory entries and change directory settings.
- Where to find it: In the left sidebar, click Staff Directory. You'll see the public page with extra staff controls at the top: Directory settings (gear icon), Import history, Upload CSV and + (Add staff member).
- Set up your structure first. Add your departments, locations and services before you add people, so you can assign them as you go.
- The directory isn't added to your website menu automatically. To link it from your site, add it in your site menu.
Don't see this? It may not be turned on for your city yet — email support@penyapp.com.
Set up departments, divisions, locations and services
- Open Staff Directory from the sidebar.
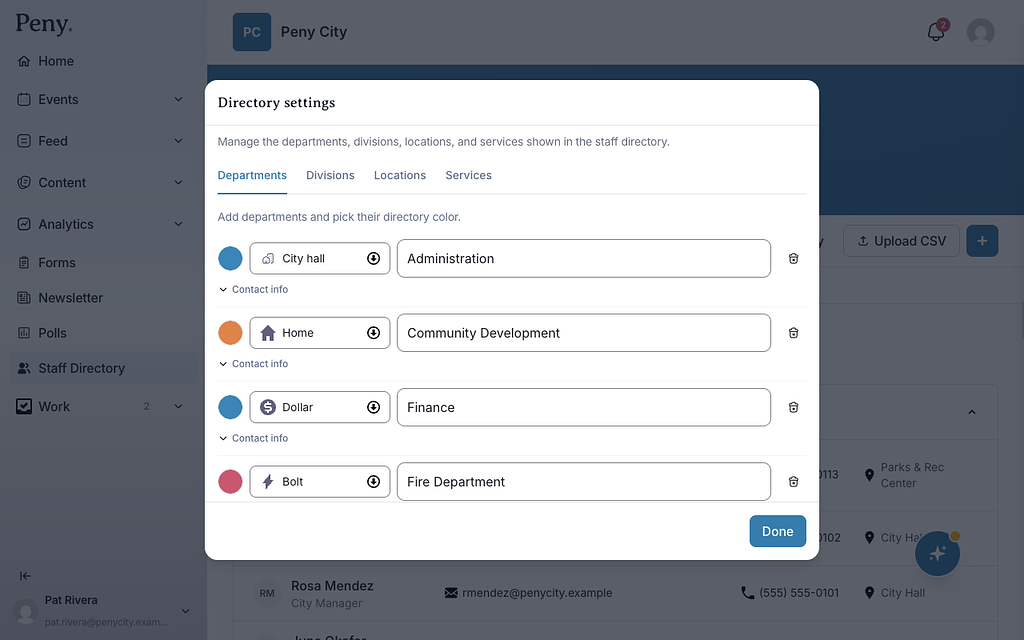
- Click the gear icon (Directory settings).
- Choose a tab: Departments, Divisions, Locations or Services.
- Add what you need (see below). Each item saves as soon as you add it.
- Click Done when you're finished.
Departments
- On the Departments tab, type a name in New department name.
- Choose a Directory color and an icon. Residents see them on the department's pills and icons.
- Click Add.
To change a department's name, color or icon, edit it in the list. Changes save automatically.
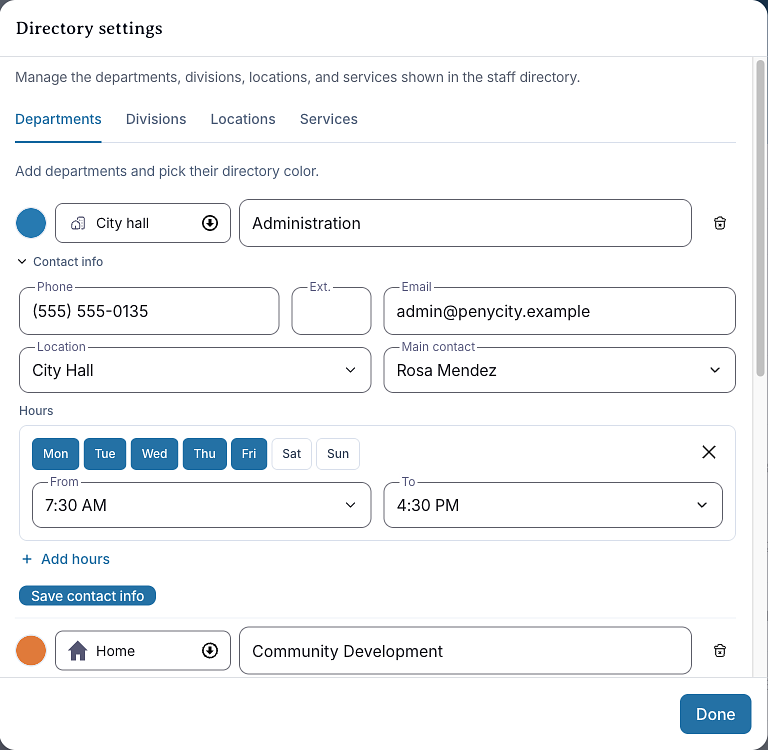
To add a department's phone, email, location, main contact and hours, open Contact info on its row, fill in the fields, and click Save contact info. This information appears wherever you use a Department Card block on your website.
Divisions
Divisions are teams inside a department. Type a New division name, choose its Department, and click Add.
Locations
Locations are the city buildings staff work from.
- Type a Location name.
- Search for the building's address, or click the map. The address fills in automatically.
- Click Add.
Services
Services are things residents need help with, like trash pickup or building permits. Each one belongs to a department. Type a New service name, choose its Department, and click Add.
Everything is listed in alphabetical order.
Delete a department, division, location or service
Click the trash icon next to it and confirm.
- Deleting a department also deletes its divisions and services. Staff members keep their records.
- Deleting a division, location or service doesn't delete any staff members.
Add a staff member
- Open Staff Directory from the sidebar.
- Click + (Add staff member). The Add New Staff Member window opens.
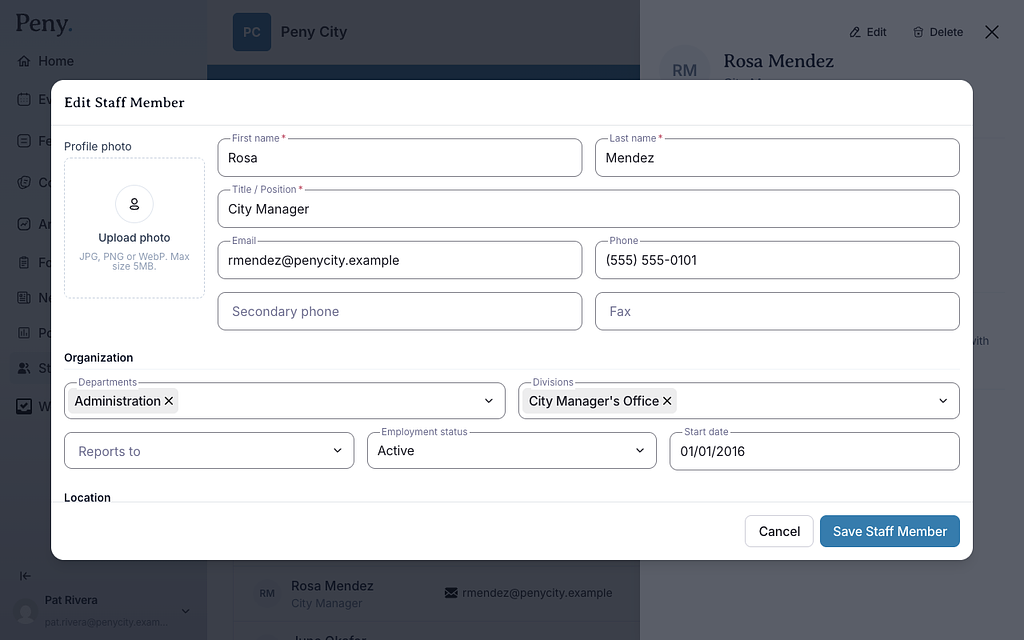
- Fill in First name, Last name and Title / Position. These are required.
- Optional: under Profile photo, click Upload photo. Use a JPG, PNG or WebP file up to 5 MB.
- Add Email and Phone. You can also add a Secondary phone and Fax.
- Under Organization, choose their Departments and Divisions, who they Reports to, their Employment status and Start date.
- Under Location, choose their Location and Office / Room. To add office hours, click + Add hours, pick the Days, and set From and To.
- Under About, add a Short bio and their Responsibilities, one per line.
- Under Services, tick the services this person handles.
- Under Contact preferences (internal use), untick anything you don't want shown on the public website.
- Optional: add Notes (internal only). These are never displayed publicly.
- Click Save Staff Member.
What residents can see
| Shown publicly | Never shown publicly |
|---|---|
| Name, title, departments and divisions | Secondary phone and fax |
| Email, phone, photo and location, if their Show … on public website box is ticked | Office / room |
| Office hours | Start date and who they report to |
| Short bio (under About) and responsibilities (under Can help with) | Notes (internal only) |
All four Show … on public website boxes are ticked for new staff members. Ask Peny can also use the public details of active staff members to answer residents' questions about who to contact.
Edit or remove a staff member
- Open Staff Directory and click the person's name.
- Click Edit to change their details, then click Save Staff Member.
To remove someone:
- Mark them inactive if you want to keep their record. Set Employment status to Inactive. They stay listed with an Inactive badge, and Ask Peny stops using their details.
- Delete them to remove them for good. Click their name, click Delete, and confirm. This can't be undone.
Import staff from a spreadsheet
You can add many staff members at once from a CSV file. If your list is in Excel, save it as a CSV first. The first row must contain column headers.
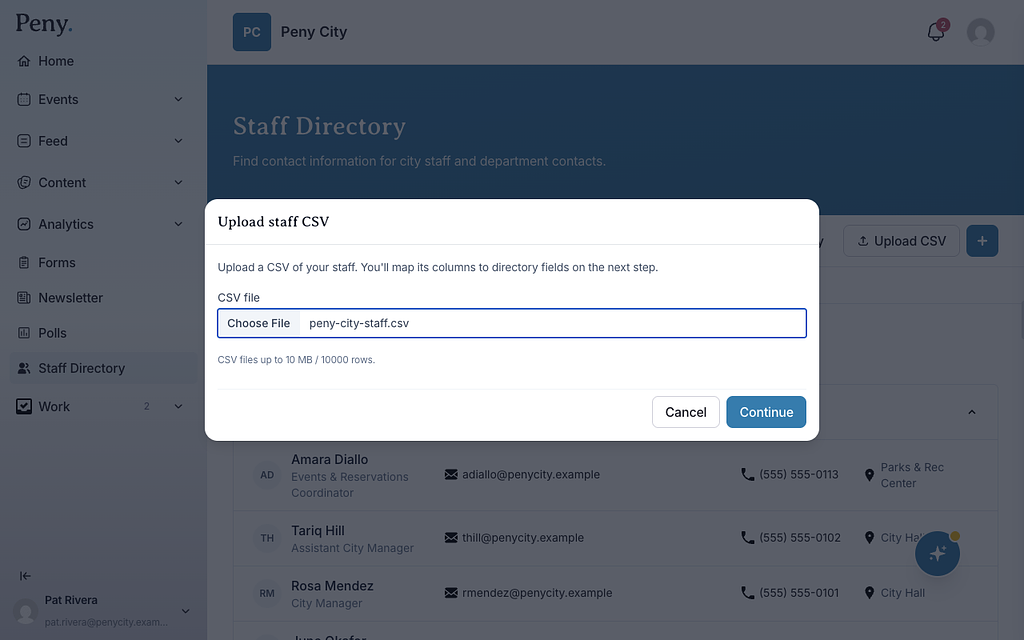
- Open Staff Directory and click Upload CSV.
- Choose your CSV file. Files can be up to 10 MB and 10,000 rows.
- Click Continue.
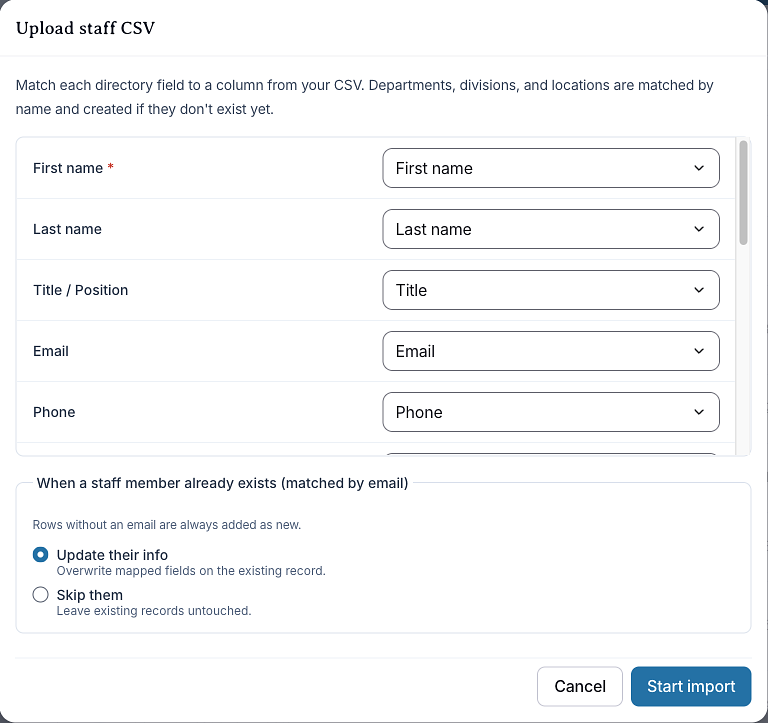
- Match each directory field to a column in your file. First name is required. Choose — Skip — for fields you don't have. Common column names, like "dept" or "job title", are matched for you.
- Under When a staff member already exists (matched by email), choose Update their info or Skip them. Rows without an email are always added as new people.
- Click Start import.
- You'll see "Your staff import has started. Refresh in a moment to see the results."
Things to know:
- Departments, divisions and locations are matched by name. If one doesn't exist yet, it's created.
- Separate several responsibilities or services in one cell with a semicolon (;).
- A division is only used when the row also has a department.
- Rows with no first name are skipped.
Check the results
- Click Import history. Each import shows its Status (Pending, Processing, Completed or Failed) and Results.
- Click an import to see how many rows were created, updated, skipped or had errors.
- Look at Row errors to find rows that need fixing. Fix them in your file and import again, or add those people by hand.