
Manage your team and permissions
Invite staff to Peny, give each person the right role, and change their access when things change.
Before you start
- Who can do this: Admins and Super Admins can invite people, change roles and deactivate accounts. Other staff can see the team list but can't change it.
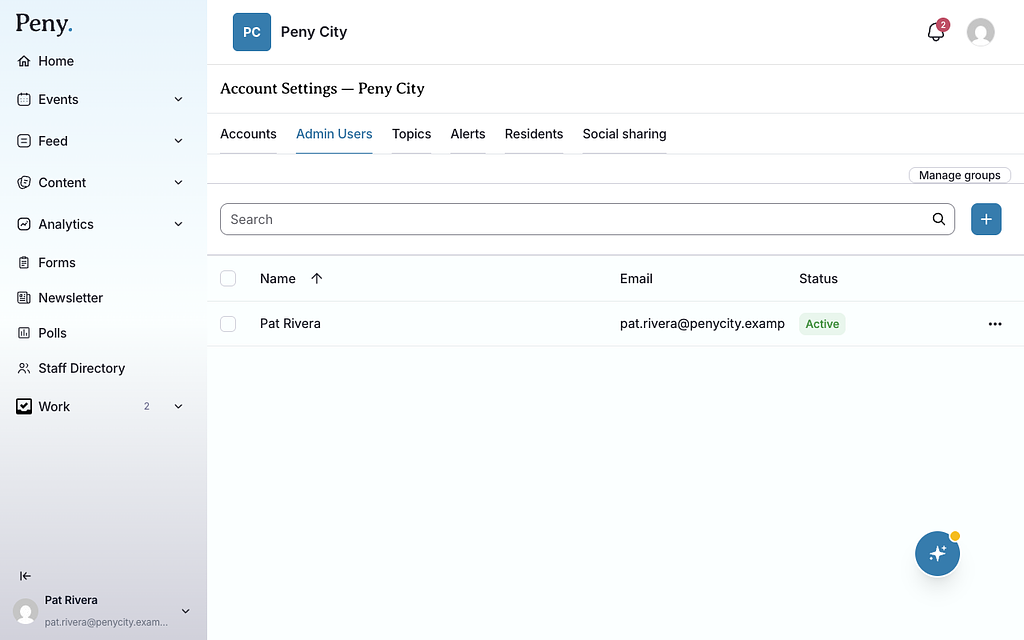
- Where to find it: Open your name at the bottom of the left sidebar, click Settings, then click the Admin Users tab.
The list shows each person's Name, Email and Status. Use the Search box to find someone. Residents aren't listed here, and neither are Peny's own staff or test accounts.
| Status | What it means |
|---|---|
| Active | The person can sign in and work in Peny. |
| Pending | You invited them and they haven't accepted yet. |
| Expired | The invitation link is more than a week old. Resend it. |
| Deactivated | Their staff access is turned off. |
Roles
Every staff member has one role for your city.
| Role | What they can do |
|---|---|
| Super Admin | Everything an Admin can do. |
| Admin | Create, publish and approve content; build website pages; invite and manage staff; change city settings, topics and residents. |
| Standard Admin (View Only) | See content, settings, the team list and residents, but not create or publish content, change settings or manage the team. They can still update the staff directory. |
The city's account owner always has full access, and their admin role can't be removed.
Invite a staff member
- Go to Settings › Admin Users.
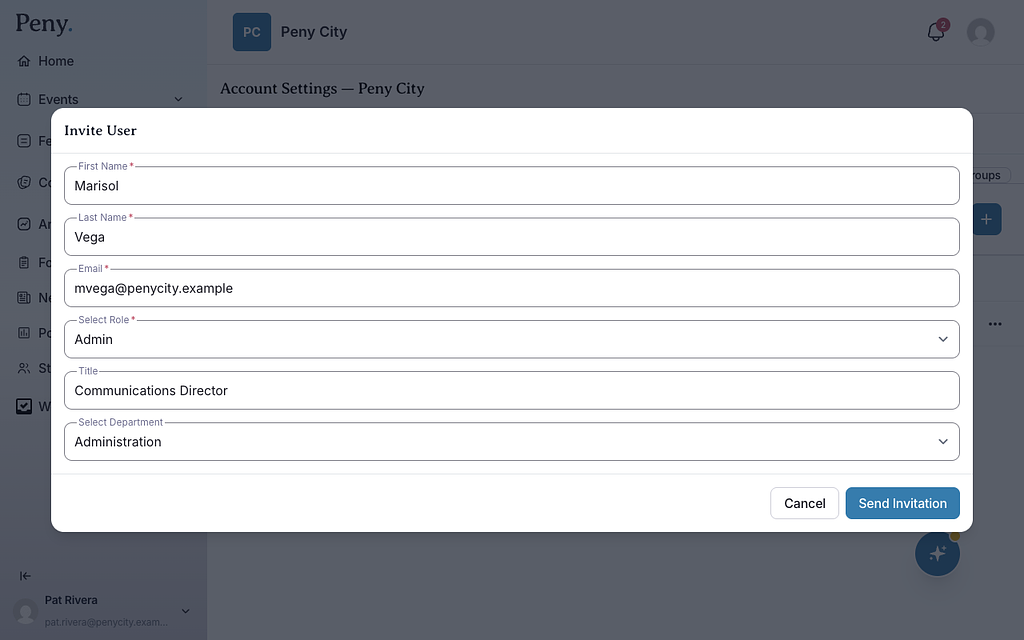
- Click + (Invite user).
- In the Invite User window, fill in First Name, Last Name and Email.
- Choose a role in Select Role.
- Optional: add their Title and choose a department in Select Department.
- Click Send Invitation.
You'll see "Invitation was sent to" followed by their email, and they appear in the list as Pending.
What the person receives
They get an email saying "You've been invited to help connect with residents" with an Activate Account button. When they click it, they sign in with the invited email address and their account is activated.
The link expires one week after it was sent. If it expires, they're asked to have you resend it, and you also get an email to remind you.
Resend or cancel an invitation
- Resend: In the person's ⋯ menu, click Resend invite. A new link is emailed, and the old one stops working.
- Change details: In the ⋯ menu, click Edit, make your changes, and click Update Invitation.
- Cancel: In the ⋯ menu, click Details, then Revoke invitation. Confirm, and the emailed link stops working. You can invite the person again later.
Change someone's role or details
- Go to Settings › Admin Users.
- Click the ⋯ menu on the person's row and click Edit.
- In the Edit User window, choose a new role in Select Role, or update their name, Title or department.
- Click Update User.
A person's email address can't be changed here.
Remove someone's access
Peny doesn't delete staff accounts. Deactivate them instead.
- Go to Settings › Admin Users.
- Click the ⋯ menu on the person's row.
- Click Deactivate.
You'll see "User was successfully deactivated." To give access back later, open the same menu and click Activate.
Deactivating someone removes their staff access to Peny. It doesn't remove them from the public staff directory. Update the directory separately.
Fine-tune one person's permissions
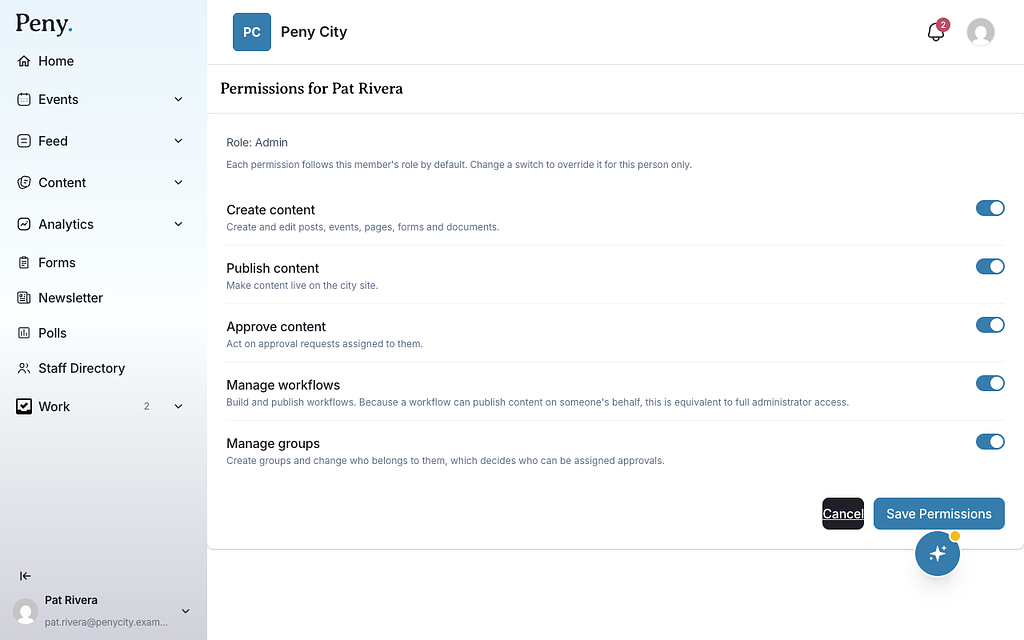
Each role comes with a standard set of permissions. Admins can turn individual permissions on or off for one person without changing their role.
- Go to Settings › Admin Users.
- Click the ⋯ menu on the person's row and click Permissions.
- Turn each switch on or off:
- Create content: Create and edit posts, events, pages, forms and documents.
- Publish content: Make content live on the city site.
- Approve content: Act on approval requests assigned to them.
- Manage workflows: Build and publish workflows. A workflow can publish content on someone's behalf, so this is the same as full administrator access.
- Manage groups: Create groups and change who belongs to them, which decides who can be assigned approvals.
- Click Save Permissions.
Each permission follows the person's role until you change it. A switch you've changed shows Overridden.
Don't see this? It may not be turned on for your city yet — email support@penyapp.com.
Create groups
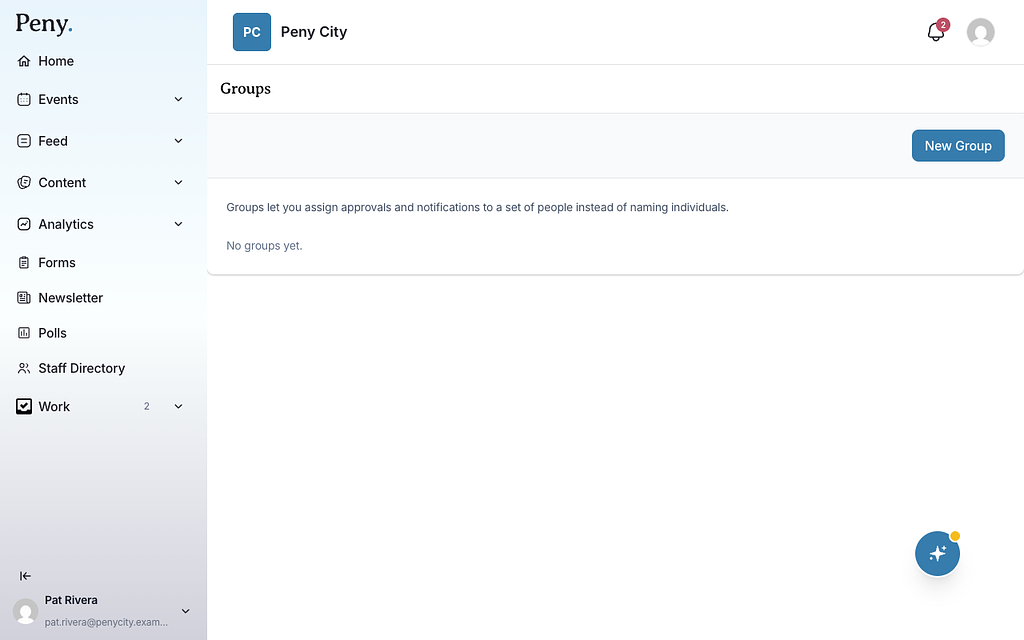
Groups let you assign approvals and notifications to a set of people instead of naming individuals. For example, you could send approval requests to a "Communications" group. Groups don't give anyone extra permissions.
- Go to Settings › Admin Users and click Manage groups.
- Click New Group.
- Type a Name and an optional Description.
- Click Save Group.
- Under Add a member, choose a staff member in Member and click Add. Repeat for each person.
To take someone out of a group, click Remove next to their name. To rename a group, click Rename. To delete it, click Delete Group. Any workflow that sends approvals to a deleted group stops working until you point it somewhere else.
You need the Manage groups permission to change groups.
Don't see this? It may not be turned on for your city yet — email support@penyapp.com.