
Reuse work with templates and saved blocks
Save a page layout or a single block once, then reuse it on other pages.
What they're for
- A template saves a page's layout so you can start new pages from it, for example a standard layout for every park.
- A saved block saves one block, such as a contact table or a call-to-action card, so you can place the same block on many pages. When you edit a saved block, every page that uses it updates.
Before you start
- City admins can create and use templates and saved blocks.
- Templates and saved blocks belong to your city. Other cities don't see them.
Save a page as a template
- Open the page in the builder.
- Click Save as template in the toolbar.
- Type a Template name, for example Standard parks page.
- Add a Description (optional) that says when to use it.
- Click Save template.
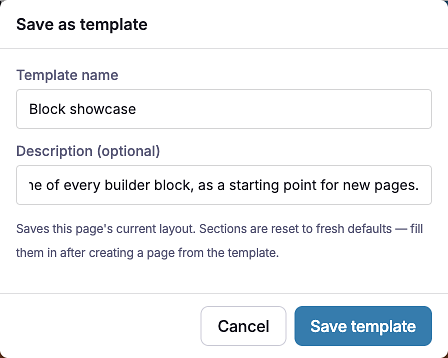
What a template keeps
A template keeps the page's layout: its containers, collapsibles, dividers and the order of its blocks. Blocks that hold your own content, such as Rich Text, Hero, Table or Image(s), start fresh on each new page. Fill them in after you create the page.
Create a page from a template
- In the City Pages list, click + (Add page).
- Type the Title.
- In Template, pick the template.
- Click Create page.
You can also click Create page next to a template on the Templates tab, or pick a template when you use + Page in the sitemap. The new page opens in the builder as a draft.
Manage templates
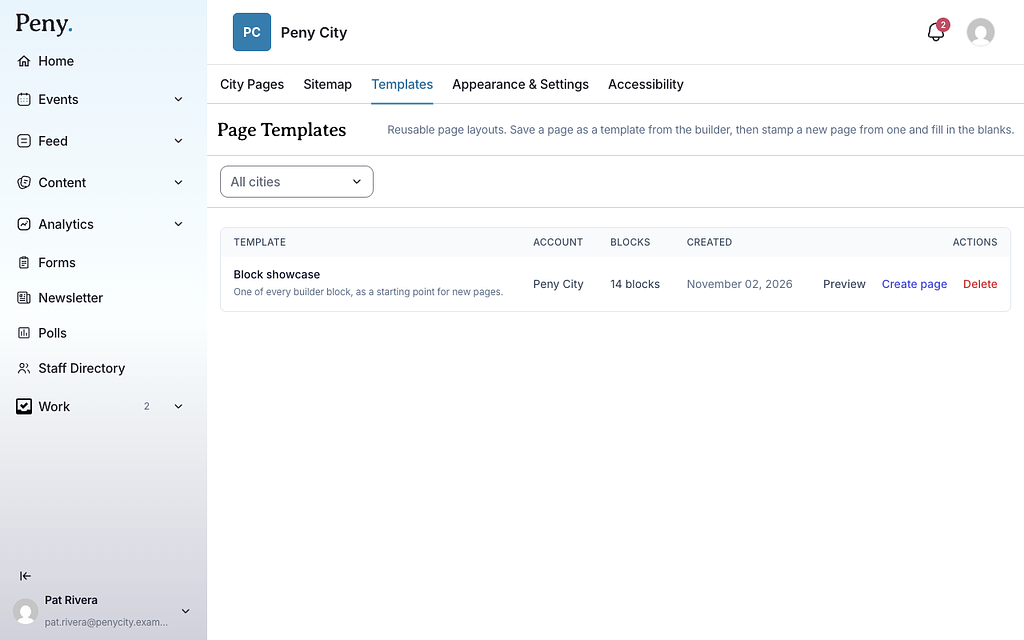
Click the Templates tab to see your templates with their block counts.
- Preview shows the template in a new tab.
- Create page starts a new page from it.
- Delete removes the template. Pages already made from it don't change.
Save a block to reuse it
You can save blocks that hold their own content: Rich Text, Hero, Quick Actions, Table, Image(s), Document Links, CTA Card, Combined Posts/Events, Contact Card, Department Card, Staff Section and Map. Blocks such as Recent Posts, Divider and Container can't be saved.
- In the builder, click the block to select it.
- Click More (⋯) in the block's toolbar.
- Click Save as block.
- Type a Block name. Residents never see it; it's how you'll find the block later.
- Click Save block.
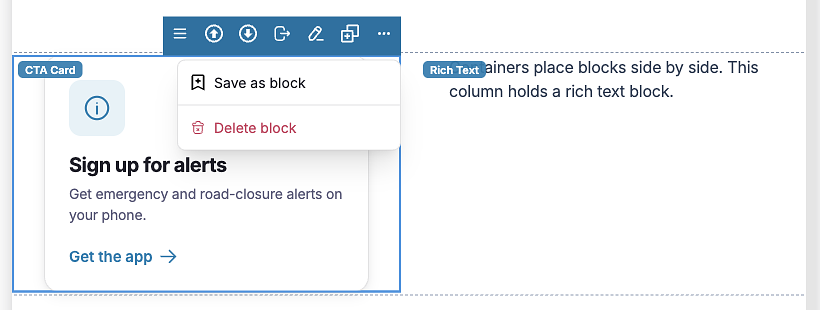
The block on this page becomes the first copy of your saved block.
Place a saved block on a page
- In the builder, click the Saved blocks tab in the left panel.
- Find the block. Type in Search saved blocks to filter the list.
- Drag the block onto the page.
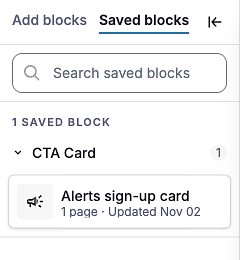
Like any change, the new block is part of your draft until you publish the page.
Edit a saved block
A placed saved block shows its name in the corner, and its pencil is grayed out. You edit it from the Saved blocks tab, not from the page.
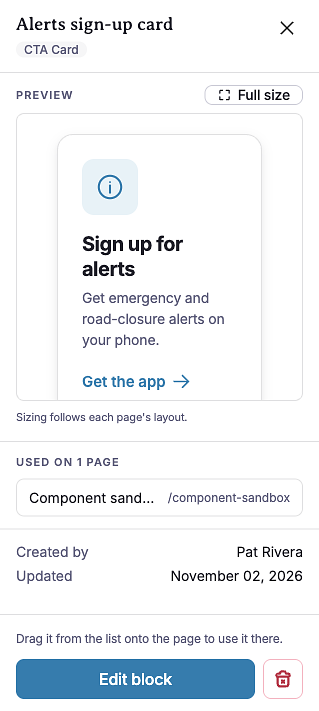
- In the Saved blocks tab, click the block.
- In the panel that opens, click Edit block.
- Make your changes.
- Click Save (in some blocks the button says Done).
A banner at the top tells you how many pages use the block. Saving updates every one of them right away, including pages that are already published. It doesn't wait for you to publish.
Change a saved block on one page only
- Select the block on the page.
- Click More (⋯).
- Click Detach from saved block.
The block looks the same, but it's now a separate copy. Edits to it affect only this page, and edits to the saved block no longer reach it.
Delete a saved block
- In the Saved blocks tab, click the block.
- Click Delete saved block.
- Confirm.
Pages already using it keep their copies.